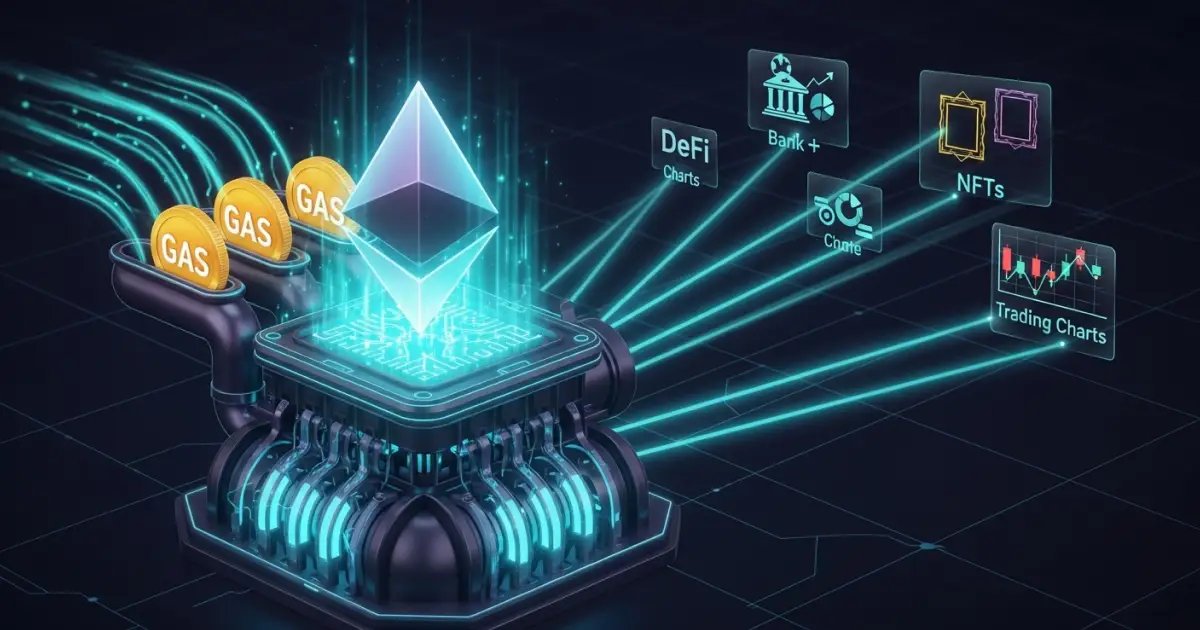
Launching an ERC-20 token on Ethereum involves defining the token's rules, creating a smart contract, testing it, and deploying it to Ethereum Mainnet. Once deployed, the contract has an on-chain address, but the token is not automatically listed on an exchange or supported by every wallet and trading platform.
For beginners, a practical route is to generate a standard ERC-20 contract with OpenZeppelin Contracts Wizard, review and test the generated code, deploy it to a testnet, and then deploy the finalized version to Mainnet. Projects that need custom token mechanics or substantial capital should involve an experienced Solidity developer and an independent security reviewer.
What You Need Before Launching an Ethereum Token
Before creating an Ethereum token, define what it is intended to do and how it will operate. These decisions affect the contract design, development workload, security requirements, and launch budget.
Define Your Token's Purpose and Supply
Start with the problem your token is intended to solve. For example, a token may support application access, governance, rewards, or a digital asset economy. Its purpose should determine its design rather than the other way around.
Set out the key token parameters before writing or generating a contract:
Token name: The full name displayed in supported wallets and applications.
Token symbol: A short ticker, such as ABC. Symbols are not globally unique, so another token may use the same one.
Initial supply: The number of tokens created at deployment.
Decimals: The number of decimal places used to represent token amounts. ERC-20 implementations commonly use 18 decimals, although this can be configured.
Minting rules: Whether additional tokens can be created after launch and which addresses, if any, have permission to mint them.
Distribution plan: How the supply will be allocated among users, contributors, a treasury, or other intended recipients.
A fixed-supply token and a mintable token have different risk profiles. If a contract allows additional issuance, document who controls that permission and under what conditions it can be used.
Also decide whether you need features such as burning, pausing transfers, or role-based permissions. Every additional feature introduces implementation and testing requirements. Avoid adding functions simply because they appear in other token contracts.
Choose an ERC-20 Development Tool
ERC-20 is the widely used Ethereum token standard for fungible assets. It defines common operations, including checking balances, transferring tokens, and approving another address to spend tokens on a holder's behalf.
For a straightforward token, consider these tools:
OpenZeppelin Contracts Wizard: Generates Solidity code from selected contract components and parameters. It is a useful starting point for standard token implementations.
Remix IDE: A browser-based development environment for editing, compiling, and deploying Solidity contracts.
Ethereum testnets: Provide environments for testing contract behavior before spending real ETH on Mainnet.
These tools reduce setup work, but they do not eliminate the need to understand the generated code. A token with custom transfer restrictions, complex permissions, upgradeability, or other nonstandard behavior may require a more comprehensive development and testing process.
For a deeper explanation of how Ethereum contracts work, see Bitunix's Smart Contracts Explained: A Beginner's Guide.
Prepare a Wallet and Test ETH
You will need a wallet that can connect to your development environment and authorize transactions. For deployment, the wallet must be connected to the intended network and hold enough of that network's native currency to pay transaction fees.
Use a separate development wallet where practical. Never enter a wallet's recovery phrase or private key into an unfamiliar website, paste it into source code, or share it with a developer who does not need custody of the assets.
For testnet deployment, obtain test ETH from a suitable faucet. Testnet ETH is intended for testing and does not have the same monetary value as ETH on Ethereum Mainnet.
Before proceeding, confirm that you can identify the selected network, inspect the wallet transaction details, and distinguish a testnet address from a Mainnet address.
How to Create and Deploy an ERC-20 Token
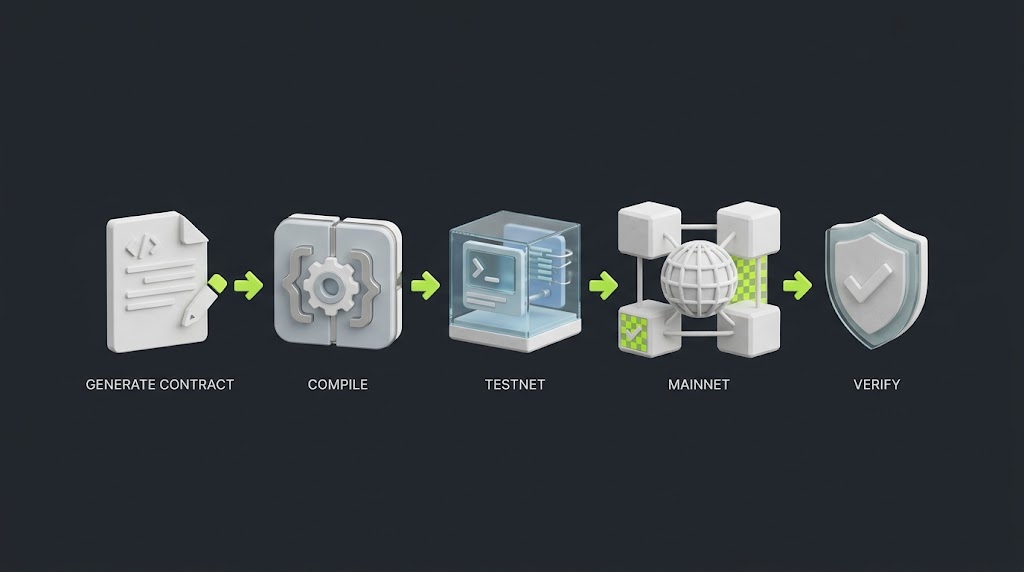
The ERC-20 deployment process moves from contract generation and testing to Ethereum Mainnet deployment and source-code verification.
The following workflow uses OpenZeppelin Contracts Wizard to generate a standard token contract and Remix as the development environment. The exact interface may change, so consult the tools' current documentation if a menu or option differs.
Step 1: Generate the ERC-20 Contract
Open OpenZeppelin Contracts Wizard and select the ERC-20 token option. Enter the token name and symbol, then configure the supply and any additional features your project genuinely needs.
Review the available options carefully. For example, a minting function may allow an authorized account to increase the supply after deployment. A pause function may allow authorized accounts to stop certain token operations. These controls can be useful in some projects, but they also create privileges that holders should understand.
Generate the Solidity code and save a copy of the exact output. Read the code rather than treating the generator as a security audit. Confirm that the contract implements the intended supply, permissions, and transfer behavior.
If the generated code includes external dependencies, make sure you understand which library versions it uses and how those dependencies are resolved during compilation.
Step 2: Review the Token Contract
Before compiling, check that the contract matches the intended token design.
At a minimum, review:
The token name and symbol.
The initial supply and how it is assigned.
The decimals setting.
Whether additional tokens can be minted or existing tokens burned.
Which addresses hold administrative or privileged roles.
Whether any transfer restrictions or custom functions are present.
Whether the code depends on external libraries or other contracts.
Pay particular attention to permissions. If one wallet can mint unlimited tokens, pause transfers, or change important settings, that authority should be intentional, protected, and clearly disclosed.
Avoid copying unreviewed contract code from social media, anonymous repositories, or unrelated token projects. A contract that compiles successfully is not necessarily safe.
Step 3: Compile and Test the Contract
Open Remix IDE, create a Solidity file, and add the generated contract code. Compile it using a compatible Solidity compiler version and the appropriate settings for the code and its dependencies.
Review compiler warnings and errors rather than dismissing them. If the contract uses imported libraries, confirm that the dependencies resolve correctly and that the selected versions are appropriate for the project.
Before deployment, test the token's behavior. Check that:
The initial supply is correct.
The intended recipient holds the expected balance.
Transfers between addresses work as expected.
The contract rejects invalid or unauthorized actions where required.
Any minting, burning, pausing, or role-management functions behave as designed.
The contract does not expose unexpected permissions or unintended ways to alter token behavior.
Testing helps identify problems but does not prove that a contract is free of vulnerabilities. Projects with meaningful user funds, custom logic, or complex permissions should add automated tests and obtain an independent security review.
Step 4: Deploy to an Ethereum Testnet
Connect your wallet to Remix using the supported wallet connection method, then select the appropriate test network. Sepolia is commonly used for Ethereum application testing. Check the current Ethereum network documentation before choosing a network for your development needs.
Obtain test ETH from a reputable faucet and confirm that both Remix and your wallet are connected to the same testnet.
Compile the contract, select the intended contract in Remix, and initiate deployment. Review the transaction details in your wallet before confirming it.
After the transaction is confirmed:
Save the deployed contract address.
Open the address in the appropriate testnet block explorer.
Check the transaction status and contract deployment details.
Interact with the contract to test transfers and other enabled functions.
Confirm that the token name, symbol, supply, and permissions match your expectations.
Test the complete user journey, not only the deployment transaction. If the token will be used in a decentralized application, test how the application reads balances, requests approvals, and handles transfers.
Step 5: Deploy to Ethereum Mainnet
Move to Mainnet only after the contract and its configuration have been reviewed and tested.
Before deployment, confirm that:
The final source code is the intended version.
The compiler version and settings are correct.
Constructor arguments and initial supply are correct.
Administrative permissions are assigned to the intended addresses.
The deploying wallet is connected to Ethereum Mainnet.
The wallet has enough ETH to cover the transaction fee.
The project has retained the source files and deployment records.
In Remix, select the correct Mainnet deployment environment, compile the final contract, and initiate the deployment transaction. Check the network and transaction details in your wallet before signing.
Contract deployment requires an on-chain transaction and costs ETH. The actual fee depends on the gas required by the contract and the network's prevailing gas price. A token contract generally requires more gas to deploy than a simple ETH transfer. See Ethereum's smart contract deployment guide.
Once the transaction is confirmed, save the contract address and transaction hash. These are important records for verification, wallet integration, user communications, and future maintenance.
Treat deployment as an irreversible release unless the contract was specifically designed with an upgrade mechanism. Do not assume you can correct the contract's behavior after deployment. Upgradeable designs introduce their own risks and should be reviewed carefully.
Step 6: Verify the Contract and Import the Token
After deployment, publish the contract's source code through a supported block explorer verification service, such as Etherscan, using the correct network, compiler version, compilation settings, and constructor arguments.
Source-code verification allows users to compare the published code with the code deployed on-chain. It improves transparency, but it is not the same as an independent security audit and does not guarantee that the contract's design is safe.
Next, test the token address in a compatible wallet. Some wallets may identify a token automatically; others may require the user to import it using the correct contract address.
Always share the token's official contract address and network through trusted project channels. A token name or symbol alone is not enough to identify the authentic asset, because different contracts can use identical names and symbols.
How Much Does It Cost to Launch an Ethereum Token?
There is no single fixed price for launching an Ethereum token. The total depends on contract complexity, deployment conditions, development requirements, security work, and the activities planned after deployment.
It helps to separate on-chain transaction fees from project and launch expenses.
Smart Contract Deployment Gas
Ethereum charges gas for executing transactions and deploying contracts. The final fee depends on the gas consumed and the effective gas price at the time the transaction is included.
A simplified calculation is:
Transaction fee = Gas used × Effective gas price
The result is denominated in ETH. The fiat value depends on the ETH exchange rate when you calculate it.
A basic token and a more complex contract may consume different amounts of gas. Additional functions, dependencies, and deployment patterns can change the gas requirement. Network conditions also vary, so an estimate made today may not apply when the deployment takes place.
Before sending a Mainnet transaction, review the wallet's fee estimate and make sure the account has enough ETH. Testnet deployment is useful for checking the process, but testnet fees do not predict the exact Mainnet cost.
Development, Testing, and Security Costs
Tools that generate standard contract code can reduce the amount of manual coding required. They do not make every token project free to develop.
Depending on the project, other costs may include:
Solidity development and code review.
Automated and manual testing.
Independent smart contract security audits.
Front-end development and wallet integration.
Hosting, monitoring, and incident response.
Legal and tax advice for the relevant jurisdictions.
A simple token with standard behavior has a different scope from a project that includes vesting, governance, custom transfer rules, upgradeability, or multiple contracts. Obtain estimates based on the actual requirements rather than relying on a universal launch-price range.
Liquidity and Other Post-Launch Expenses
Deploying a token does not automatically create a market for it. If the project intends to support decentralized trading, it may need to provide liquidity to a compatible trading pool.
The required amount depends on the chosen trading pair, pool design, expected activity, and launch objectives. Liquidity is not simply a one-time deployment fee: providers may face price volatility, impermanent loss, and other risks associated with pool participation.
Additional expenses may include website development, documentation, community operations, market data integrations, and exchange-related requirements. Centralized exchanges set their own listing and review processes; a token contract does not guarantee acceptance.
Build a budget that separates deployment gas, development, security, liquidity, and ongoing operating costs. This makes the real financial commitment clearer than quoting a single headline price.
What to Do After Deploying Your Token
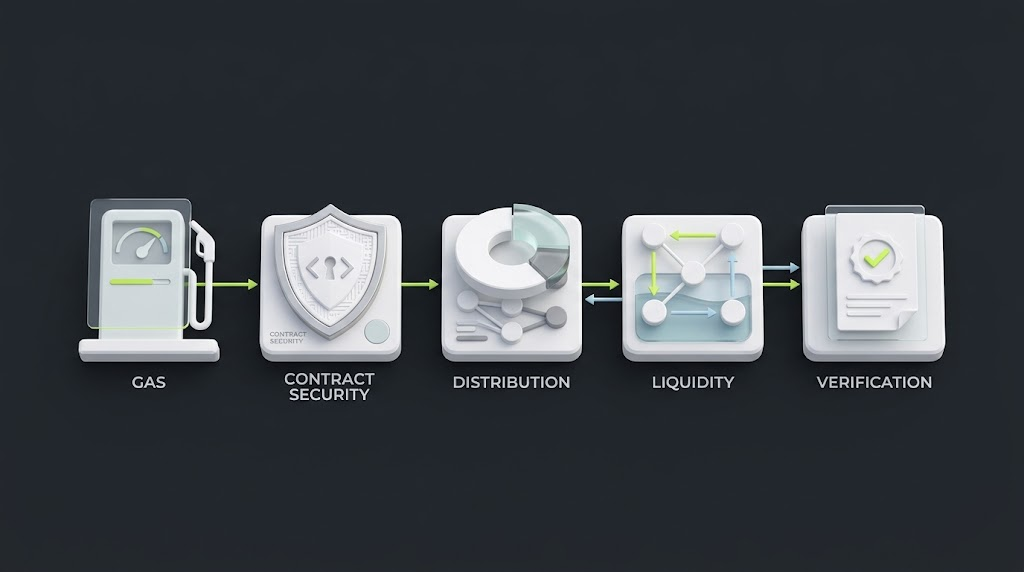
A successful token launch requires more than deployment, including gas planning, smart contract security, token distribution, and liquidity preparation.
A successful deployment confirms that a contract has been created on the selected network. It does not confirm that the token is secure, widely supported, liquid, or ready for every intended use.
Check the Contract and Token Details
Start with the deployed contract address and its block explorer page. Confirm that the transaction succeeded, the source code is verified where supported, and the token details match the project's published information.
Check the initial supply, balances, privileged addresses, and any custom functions. If the contract has minting or administrative permissions, document who controls them and how those permissions are protected.
Publish the official contract address and network in a location users can verify independently. If you operate a website or application, make sure it uses the correct address and does not confuse the token with unrelated contracts that share its name or ticker.
Plan Token Distribution and Liquidity
A token distribution plan should explain where the supply goes, whether any allocations are subject to vesting, and how the project will communicate changes to users.
If you plan to enable decentralized trading, research compatible decentralized exchanges and liquidity pools. Review the pool's supported assets, fee structure, liquidity requirements, and the risks of providing liquidity. Adding a token to a pool can make swaps possible, but it does not guarantee trading volume or a stable market price.
Avoid presenting liquidity, projected demand, or token appreciation as guaranteed outcomes. Explain the mechanics and risks in clear language.
Understand Exchange Listing Requirements
A token deployed on Ethereum is not automatically listed on a centralized exchange. Each exchange determines its own eligibility, due diligence, technical integration, and listing requirements.
Before approaching an exchange, prepare the information it may request, such as:
The official contract address and network.
Verified source code and technical documentation.
Token supply and distribution details.
Project information and relevant legal documentation.
Security review results, where available.
Contact information and plans for ongoing support.
Do not imply that a token is listed, endorsed, or supported by an exchange unless that status has been confirmed through an authoritative source.
Security and Legal Checks Before Launch
A token can be technically functional while still exposing holders or the project to serious risks. Security and legal review should be part of the launch process, not a task postponed until after the token is live.
Review contract permissions. Confirm who can mint tokens, pause transfers, change settings, or perform other privileged actions. Use appropriate access controls and secure the relevant accounts.
Test edge cases. Review transfers, approvals, access restrictions, and custom functionality. Consider how the contract behaves when users submit unexpected inputs or when an external dependency behaves differently than expected.
Obtain an independent review where appropriate. Automated tools and test suites can find some issues, but they cannot guarantee the absence of vulnerabilities. Projects handling meaningful value should consider a qualified independent audit. For further reading, see Bitunix's guide to Developing Secure Ethereum Smart Contracts.
Understand the limits of deployment changes. Many deployed contracts cannot have their code changed directly. If the design uses proxies or another upgrade mechanism, users need to understand who controls upgrades and what safeguards exist.
Assess legal and regulatory obligations. The treatment of a token depends on its features, how it is offered, how it is marketed, and the jurisdictions involved. A token's technical classification as ERC-20 does not determine its legal status. Seek qualified legal advice before offering tokens, soliciting funds, or making claims about rights or returns.
Communicate risks accurately. Publish clear documentation on the token's purpose, supply, permissions, distribution, and limitations. Avoid misleading claims about audits, exchange listings, expected returns, or security guarantees.