
To make trading more efficient for every user and provide a more in-depth trading experience, Bitunix Chart Trading 2.0 has officially launched! This upgrade focuses on optimizing key pain points for professional traders, including order placement paths, automated strategies, and position management. Today, we will first walk you through the new Quick Panel Order Trading feature, focusing on the operation guide for Trigger Orders and Limit Orders.
Quick Panel Order Trading Guide
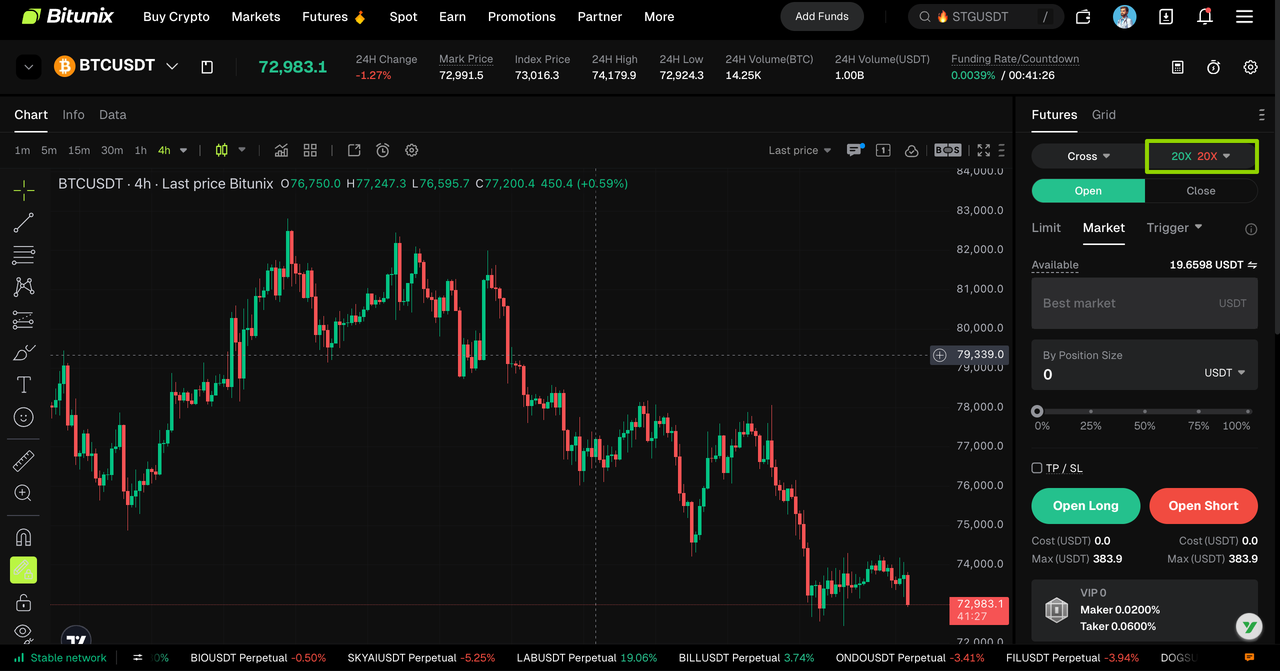
1. Special Reminder: Set the Leverage Ratio Before Trading
Before trading with the quick panel, please make sure to adjust your leverage first. The leverage setting is located in the upper-right corner of the trading interface, such as 20x. You can set the corresponding leverage multiples for Open and Close based on your own risk preference. After selecting the appropriate leverage, you can place futures orders with better control over capital risk.
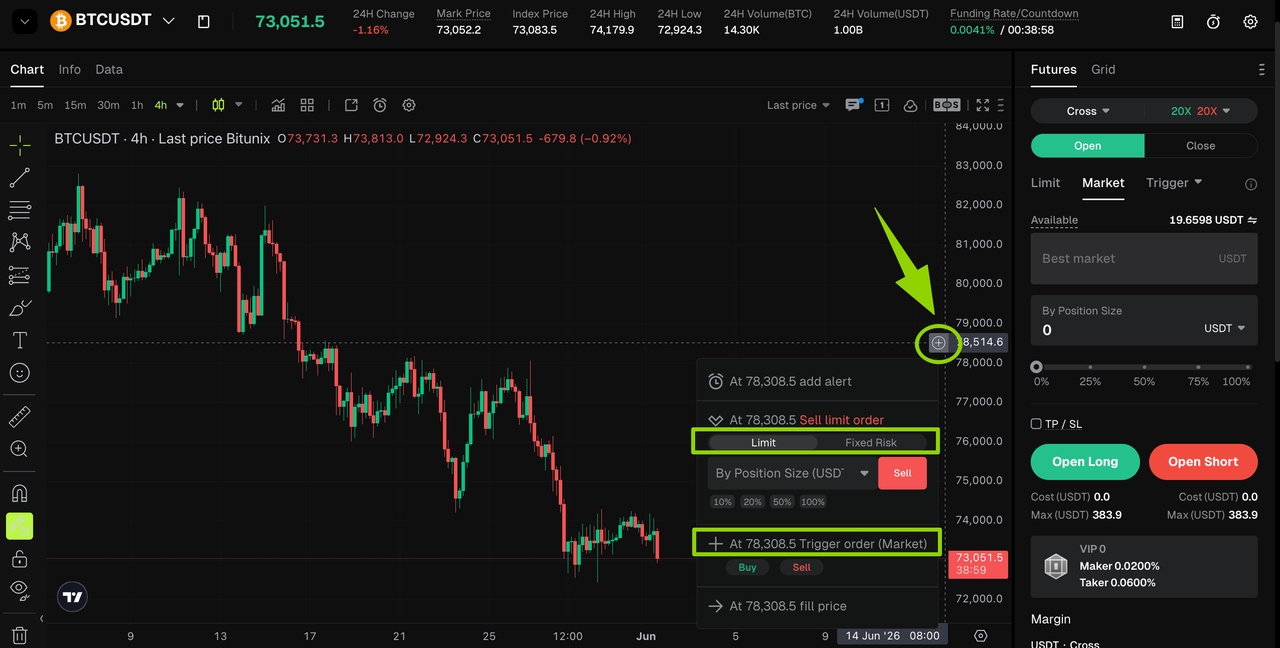
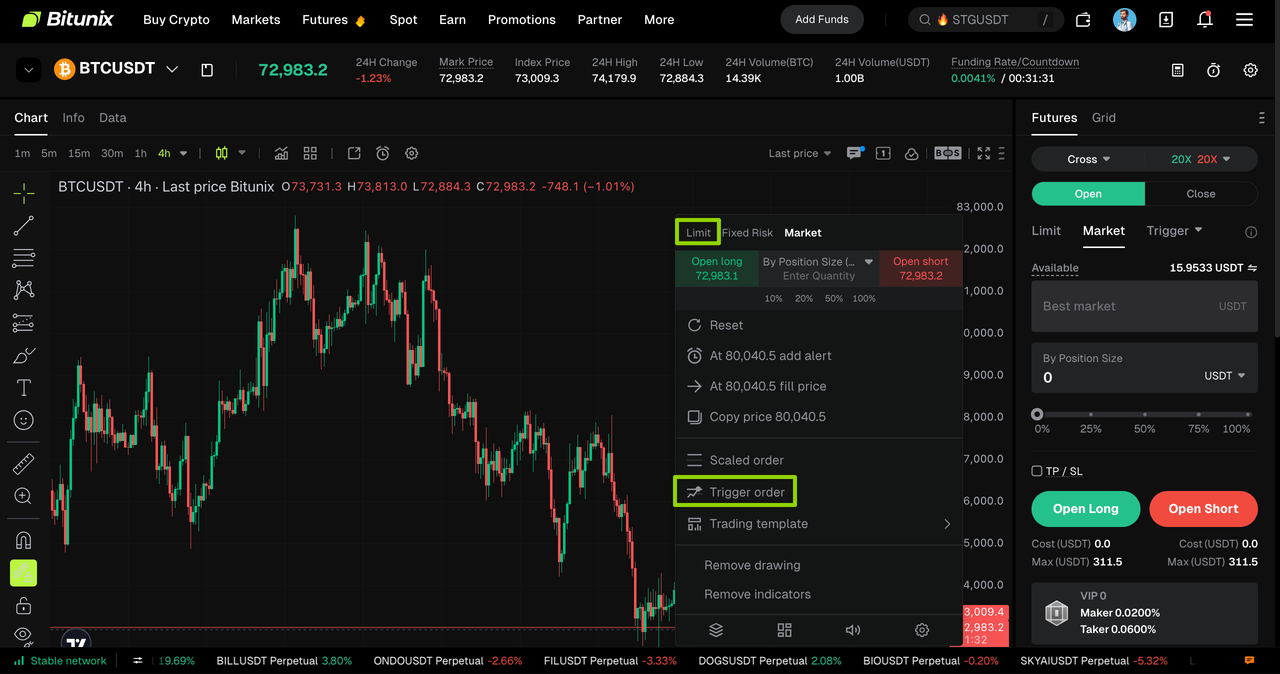
2. 【Plus Icon】Order Trading Method
Method 1: Click the “+” icon on the side of the K-line chart. After clicking it, the order trading panel will provide three trading modes: Limit Order, Trigger Order, and TP/SL

【Plus Icon】Introduction to the Comprehensive Order Panel
The plus icon menu integrates three trading modes: Limit Order, Trigger Order, and TP/SL.
• In Limit Order, you can enter the Buy/Sell token amount, then click the corresponding button to trigger and complete the transaction.
• In Trigger Order, you need to click the Buy/Sell button below, and a new input box will appear. In the input box, you can choose the amount of tokens you want to buy. Once the token price reaches your set price, the buy order will be triggered.
• After the transaction is completed, a new display bar will appear at the bottom of the window, showing your profit and loss information and the TP/SL button.
3. 【Right-Click】Order Trading Method
Method 2: In the K-line chart, right-click with your mouse to open the quick order window. You will then see the sub-order and Trigger Order trading modes.
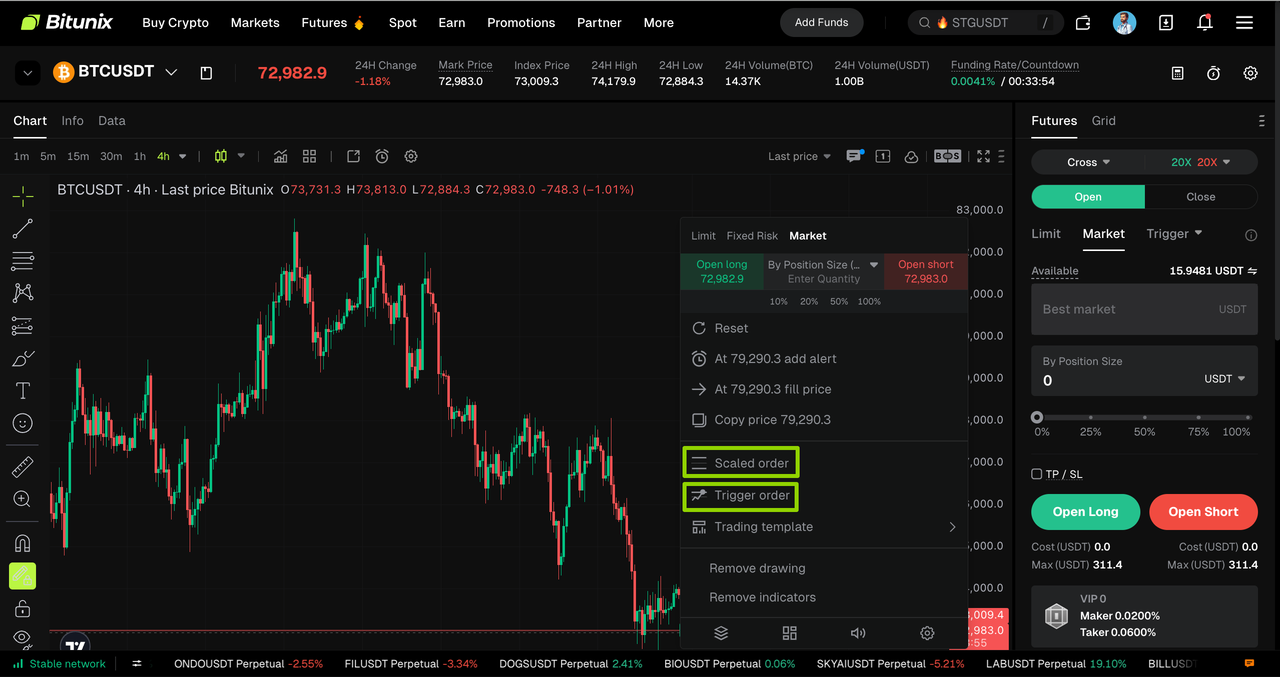
【Right-Click】Introduction to the Comprehensive Order Panel
The Trigger Order button in the right-click menu integrates market price order placement.
• Click Trigger Order, and a new input box will appear. In the input box, you can choose the amount of tokens you want to buy. Once the token price reaches your set price, the buy order will be triggered.
• After the transaction is completed, a new display bar will appear at the bottom of the window, showing your profit and loss information and the TP/SL button.
• If you want to trade with a Limit Order, you can use the first button in the right-click menu to place a limit order through the quick panel.

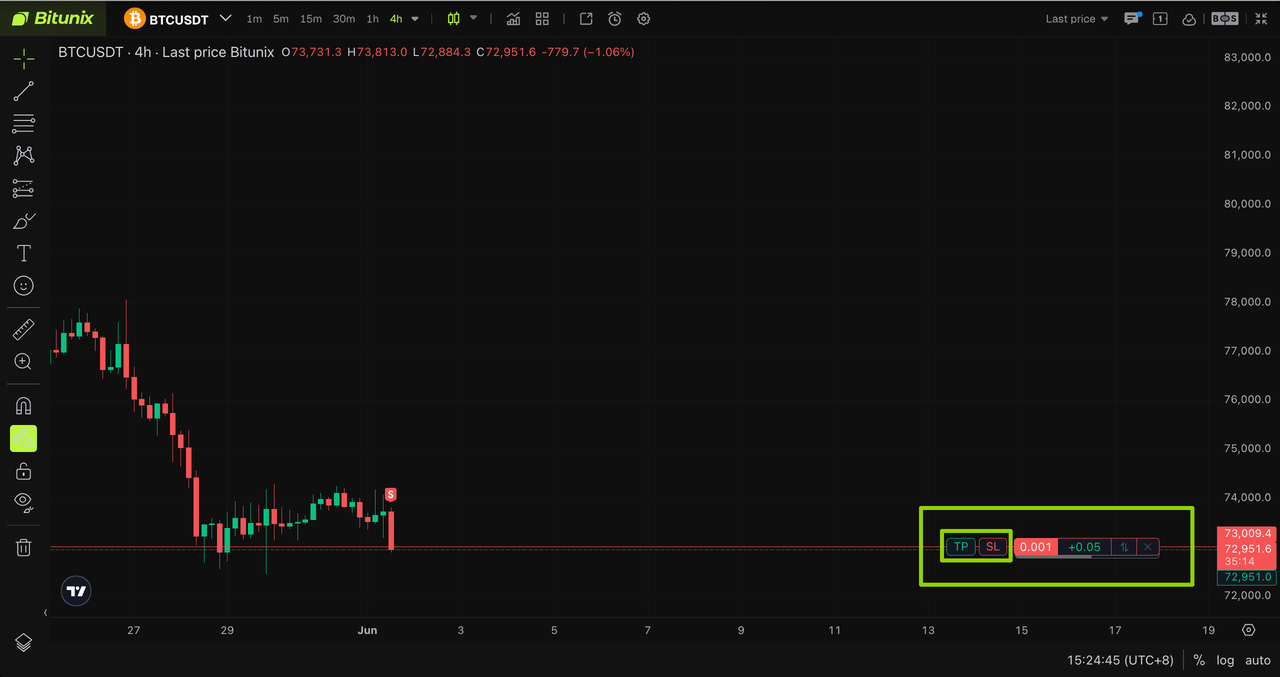
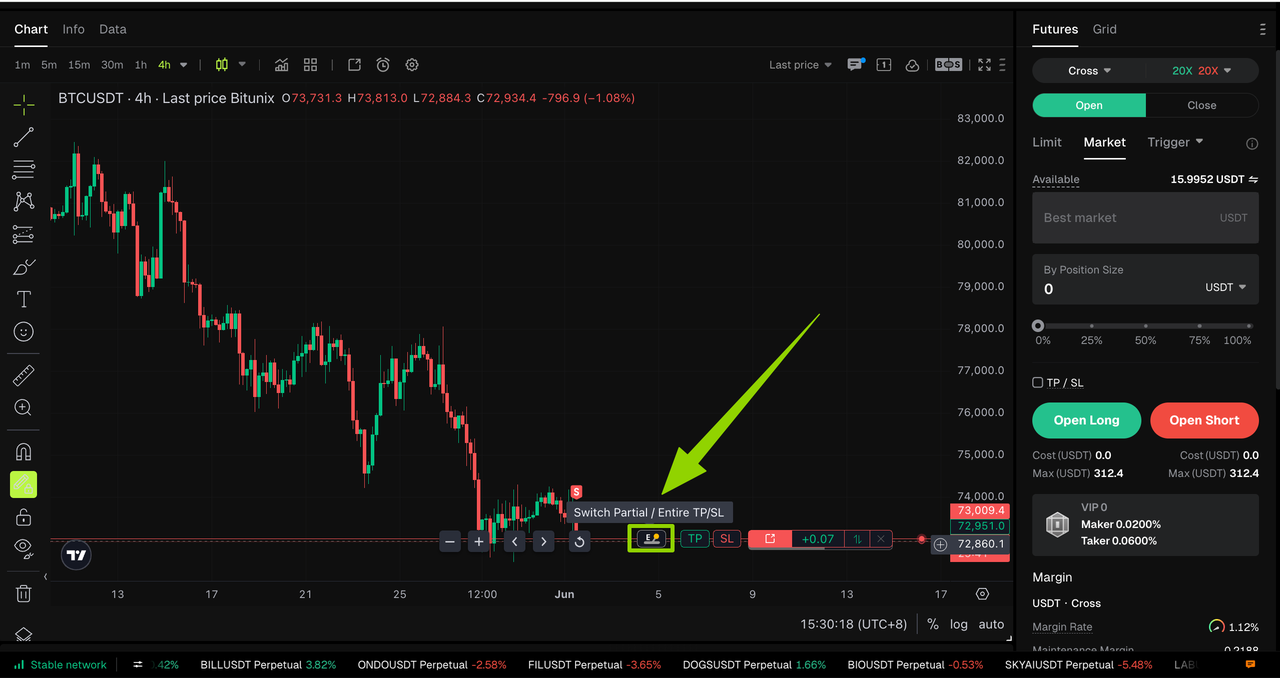
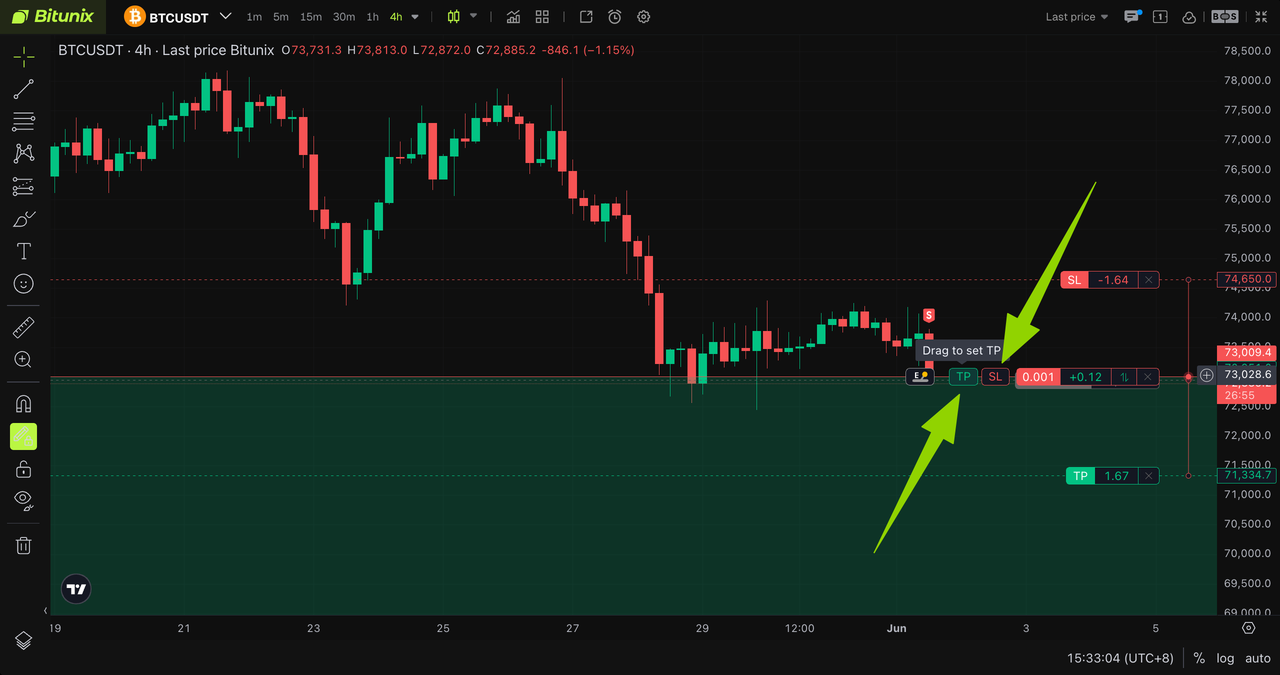
4. Take Profit and Stop Loss: Refined Risk Control
After opening a position, the status bar at the bottom of the chart will activate the Take Profit/Stop Loss (TP/SL) function.
The E/P button on the left side of the status bar allows you to switch the position closing mode.
• E = Entire Position Mode: After selecting E, dragging the TP/SL slider will apply the take-profit or stop-loss setting to the entire position.
• P = Partial Position Mode: After selecting P, drag the TP/SL slider on the status bar to set your parameters. This allows you to accurately select the number of positions that need to take profit or stop loss, enabling partial position closing and more flexible risk control.

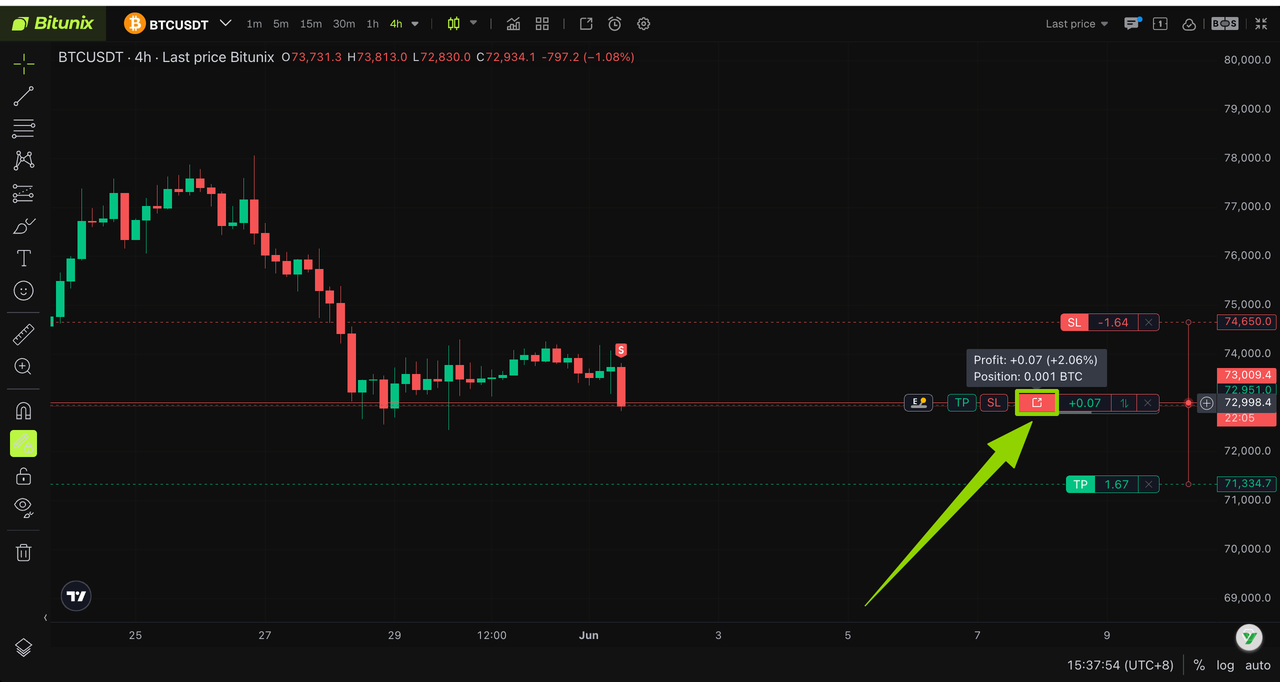
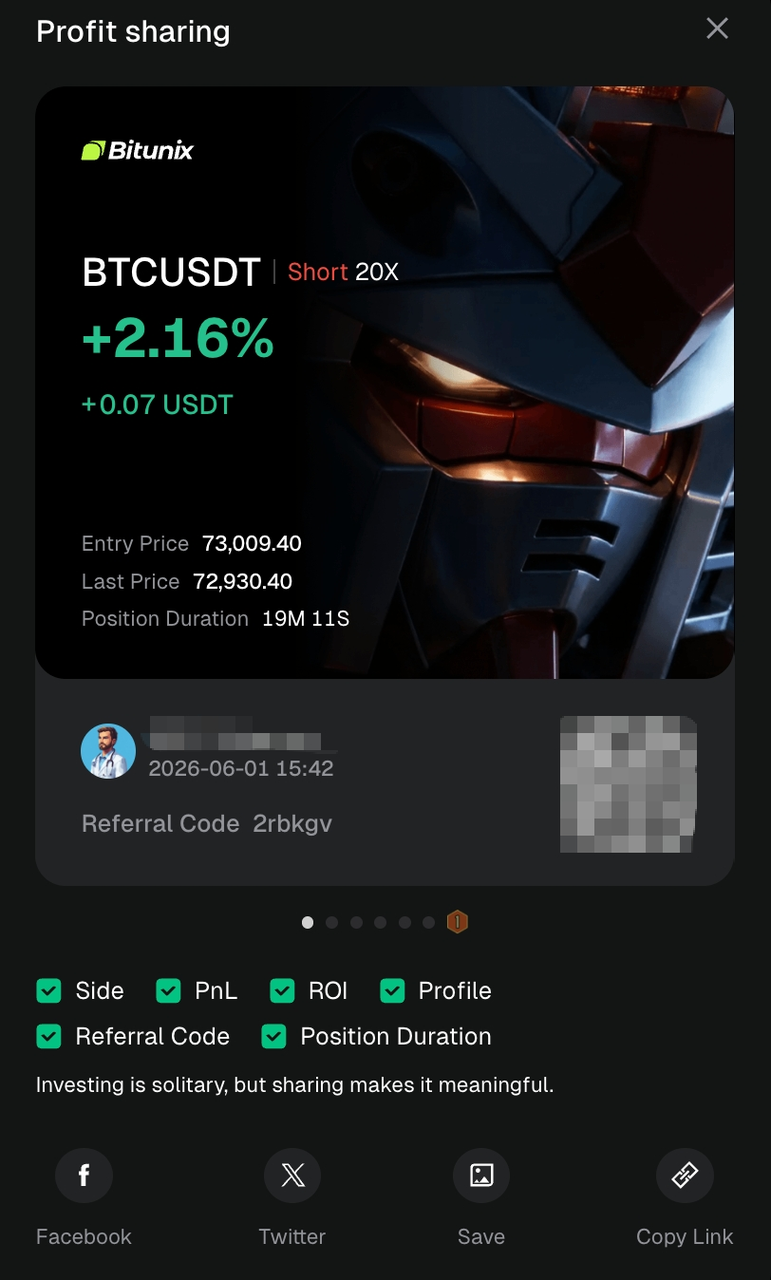
5. Share Your Trading Results: Position Sharing
Want to share your trading highlights? Hover your mouse over the status bar area, and the Share button will appear immediately.
Click the Share button to generate an exclusive poster. You can then share it directly to major social platforms and showcase your Bitunix trading records to your friends.
Disclaimer
This article is not intended to provide:
(i) investment advice or recommendations;
(ii) an offer or solicitation to buy, sell, or hold digital assets; or
(iii) financial, accounting, legal, or tax advice.
Digital assets, including stablecoins and NFTs, are highly volatile and involve significant risk. Please carefully consider your financial situation and risk tolerance before trading or holding digital assets.
Consult your independent legal, tax, or investment professional to ensure that your actions comply with applicable local laws and regulations.